People often accuse me of using excessively large words to express myself. I am mildly offended by these outrageous accusations, because my stated policy is to eschew obfuscation.
By way of rebuttal, I offer up my word of the day: ANTHROPOMORPHISM.
As everyone has known since 1753 (the first recorded use of this term according to Merriam Webster), anthropomorphism is the attribution human characteristics to inanimate objects.
What does this word have to do with better wildlife imagery? Simple - no other art form has such a high level of anthropomorphizing as photography. Our society loves a quick fix, and many feel that an eye-popping result is the natural, native output of expensive technology.
Upon seeing a compelling image, the first question usually posed to the photographer is, "What camera/lens do you use?" This can be a legitimate question for a number of technical reasons, but is more often symptomatic of the belief that "professional" gear was the main reason for the engaging outcome. This phenomenon has camera companies dancing the Light Fantastic, but for everyone else it's a simple delusion.
The first step towards better wildlife photography is to stop attributing the hard work, creativity, patience, practice, and skills that are critical for success to inanimate tools. These are all human traits - merits of photographers, not cameras. Step 1 is to quit anthropomorphizing, and start creating using whatever is in your bag.
The most important elements of a compelling wildlife image are light, composition, opportunity, and exposure (in no particular order). Cameras and lenses have no part in the first 3, and only a supporting role in the 4th.
LIGHT: Learning to "see" light, and recognize the characteristics that translate into various artistic outcomes is a skill that takes years to develop. Volumes have been written on this topic, and doing a Google search for "golden hour" will probably provide all you ever want to know about ideal illumination. To achieve the result you want as a photographer, your boots need to be on the ground (with you in them) when the light is right.
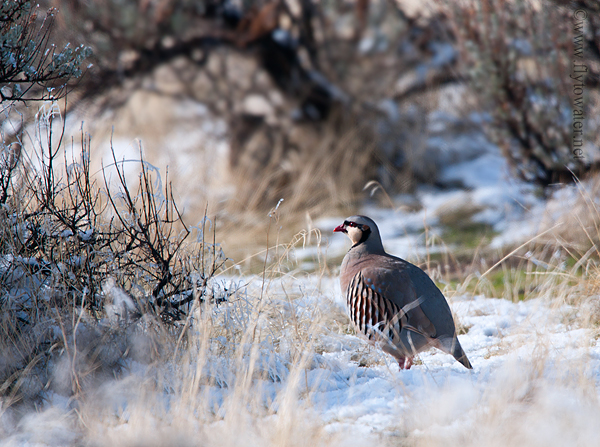
COMPOSITION: The way in which objects are arranged (intentionally and creatively) within the frame. There is nothing about composition that should be left to chance. Inclusion, exclusion, angle of view, position relative to the subject(s), portrait vs. landscape orientation, foreground, background, and many other considerations play an enormous part in how the viewer will interpret a 2-dimensional image. A great starting point on this topic is a book called "Photographic Composition" by Grill and Scanlon ($15 on Amazon). In this shot of a wild chukar partridge, I included both cheat grass in the foreground and sage brush in the background as compositional elements, but used shallow depth of field to isolate the subject. The bird is also positioned according to the Rule of Thirds.
OPPORTUNITY: Think of 3 separate lines converging at different angles. One of these lines represents the right lighting conditions. The second is your wildlife subject, which will be somewhat unpredictable and dynamic. Line #3 represents surroundings that create a pleasing foreground, background, and overall composition. When each of these elements converge and intersect, the result is a window of opportunity . All 3 elements must be present to win. While some opportunities happen by chance, most are created through careful planning, understanding of subject behavior, a high degree of familiarity with your camera controls, awareness of your limitations, and a constant readiness to act.
The single most challenging part of wildlife photography is getting close enough to the wildlife. Many point & shoot cameras offer 8x, 10x, or even 20x optical zooms in tiny little packages. The uninitiated often see huge telephoto lenses and assume they are camera-mounted galactic telescopes with the ability to capture amazing images of sparrows at 300 meters.
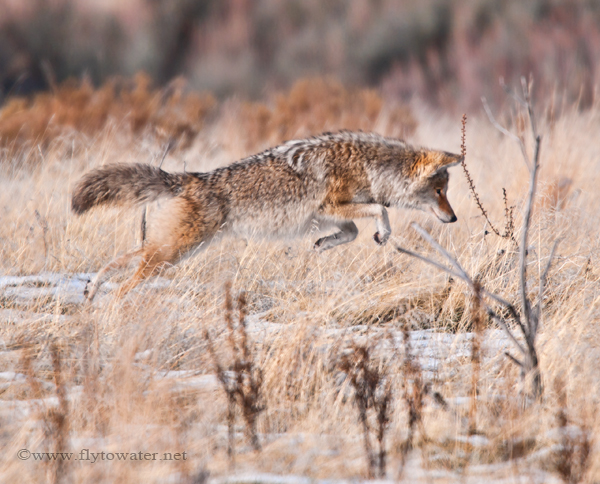
The truth is that big lenses are designed to let in more light, allowing for faster shutter speeds while maintaining high optical quality. The Nikon 400mm f/2.8 VR lens costs $9000 and weighs 13 pounds, but only provides the equivalent of 8x optical magnification. As a photographer, you need to be every bit as close to your subject with a super telephoto prime lens as you would with a cheap 8x point and shoot. Most quality wildlife imagery is captured inside of 60 yards, and often much closer (especially with smaller subjects). The coyote pictured below was 35 yards away, and was only in this position looking back at me for about 1 second.
Working hard to pattern wildlife subjects and understand their behaviors will allow you to anticipate their location during ideal lighting conditions. In turn, this will improve your ability to be in the right place at the right time. Wildlife photographers spend most of their day scouting, observing, getting into position, and waiting. There is no magic bullet lens, teleconverter, or 25 megapixel sensor that will buy sweet monkey love over long distances. If the subject is too far away for a solid image to be captured, it's not a shortcoming of the equipment - but of the photographer's ability to close the distance.
EXPOSURE: Today's cameras all offer the pixie dust of Auto Mode - the enemy of creativity. Auto Mode is designed for one thing: Boring-Ass Snap Shots, or B.A.S.S. While the camera's electronics can interpret a scene and correctly expose the photograph for you, they cannot detect your vision of the final image.
Decisions to freeze action, blur motion, isolate a subject with shallow depth of field, or include both foreground and background elements in the composition are all consequences of different exposure choices. These strictly artistic decisions are directly related to how the viewer will connect to your image, and can't be left to a generic, pre-programmed function.
The good news here is that there are only about 5 key camera controls that do most of the legwork. Check out "Understanding Exposure" by Bryan Peterson ($15 on Amazon) if terms like aperture, f-stop, shutter speed, white balance, exposure compensation, and ISO are unfamiliar.
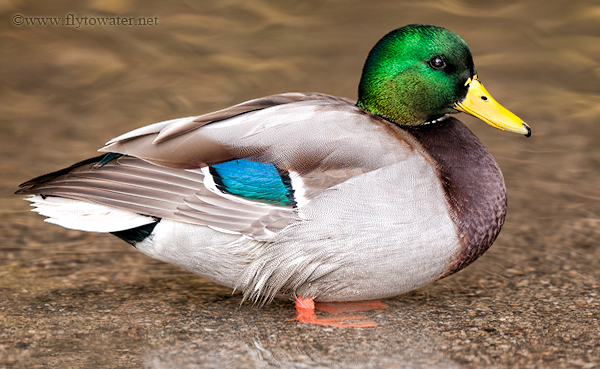
In these final 2 shots I used exposure for different effects. The mallard drake was stationary, and I wanted the colors and plumage of the bird to be the primary focus. Using a longer shutter speed I achieved motion blur in the faster moving background water, while maintaining sharpness on the bird itself. In the case of the coyote, I chose to freeze motion with a shutter speed of 1/3200 to capture his predatory intensity.
The moral to the story - use what you've got and don't put off chasing the imagery you desire until you have a better camera body or longer lens. Procrastination should not lilt off the tongue any easier than anthropomorphism - which is only 1 letter longer.
I'm wishing everyone a happy and prosperous New Year in 2011. Thanks for dropping in.
Wednesday, December 29, 2010
Better Wildlife Photography
Labels:
Better,
Fly to Water,
How-to,
Instructions,
Photography,
Take,
Tips,
Wildlife
Thursday, December 2, 2010
FlyFisher Magazine
The Federation of Fly Fishers is one of the premier organizations dedicated to conservation, preservation, and education in the world of fly fishing. Whether you're just getting started in the sport, or have the veteran status marked by a vehicle festooned with decals - anytime is a good time to join.
http://www.fedflyfishers.org/
One of the perks of membership is a subscription to FlyFisher Magazine.
FFF can also be found on Facebook.
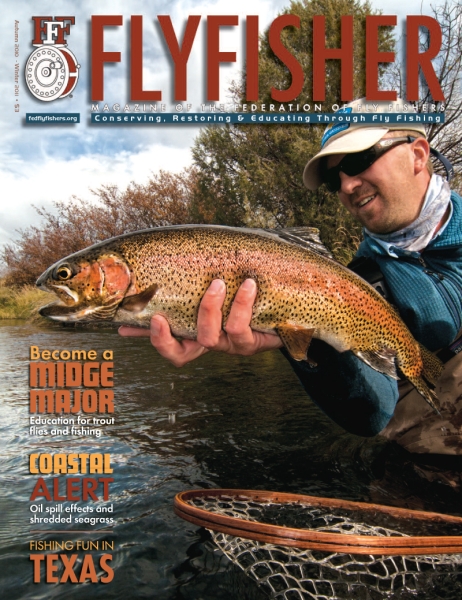
I appreciated working with Al Beatty on the cover of the Autumn 2010/Winter 2011 cover of FlyFisher this past month. "Mr. December" is Worldcast guide Casey Birkholz. This image was taken 10/15/2010 using a Nikon D300, Tokina 12-24mm lens, and a Tiffen HT 0.6 ND Grad Filter.
Subscribe to:
Posts (Atom)


