Showing posts with label Photograph. Show all posts

Monday, January 16, 2012

Getting Started in Photography - Part 3

This week the eyes of world have been on CES, or the Consumer Electronics Show.  A huge part of the proceedings involves photography equipment which will allow you to get unprecedented shots of awesomeness.  Sadly, without the latest gadgets, your imagery is doomed to becoming a festering pile of digital offal.

In this installment of GSiP, Fly to Water saves you the cost of a brand spanking new Nikon D4 and spills the beans on how to get excellent, close-up shots of wildlife by:

Getting Close Enough to the Wildlife
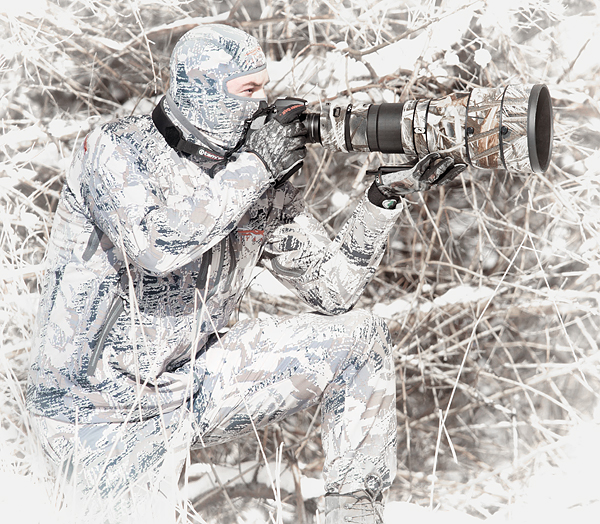
Snowblind

(Photo of me: www.jaymorr.com, Post: Me)

One of the biggest misconceptions out there is that prime lenses, like spotting scopes, are designed for high magnification.  It's wishful thinking.  Baboons probably wish they didn't have those garish, red asses all the time but it doesn't change anything.  Expensive glass is actually designed around a very large aperture, which allows more light into the camera and therefore expands the range of conditions that can be dealt with by the photographer.

In these posts I've tried to offer some low-cost suggestions that helped me greatly in learning how to advance my outdoor photography.  The single, most significant improvement you will ever see in your wildlife images will come from learning how to get closer.  Gear is nice, and over time you will find yourself upgrading.  Here's the bottom line: My best wildlife images have come from my closest encounters with wildlife.  A few weeks ago I captured my all-time favorite image a of a chukar partridge.  I was 6 steps from the bird, in good light.  The result would have been great with any SLR and 300mm lens, or point and shoot with 6x optical zoom.

The motif you might be noticing is: WORK.  There is no EASY button or quick fix.  It will take a lot of time and patience - patterning and stalking animals involves skills which must be developed and practiced.  Effort and dedication provide the pay off - everything else is secondary.  The best advice I can give:

Find a place where your subject wants to be, and habitually frequents.  Get there first, and wait.  It's that simple, and that complex.  Many are unprepared for the time investment.  As a somewhat general rule, the average is probably close to 1 good opportunity per full day in the field with wild subjects.  Understand that, and have realistic expectations.  Your commitment will pay dividends.

Bird's Eye View:
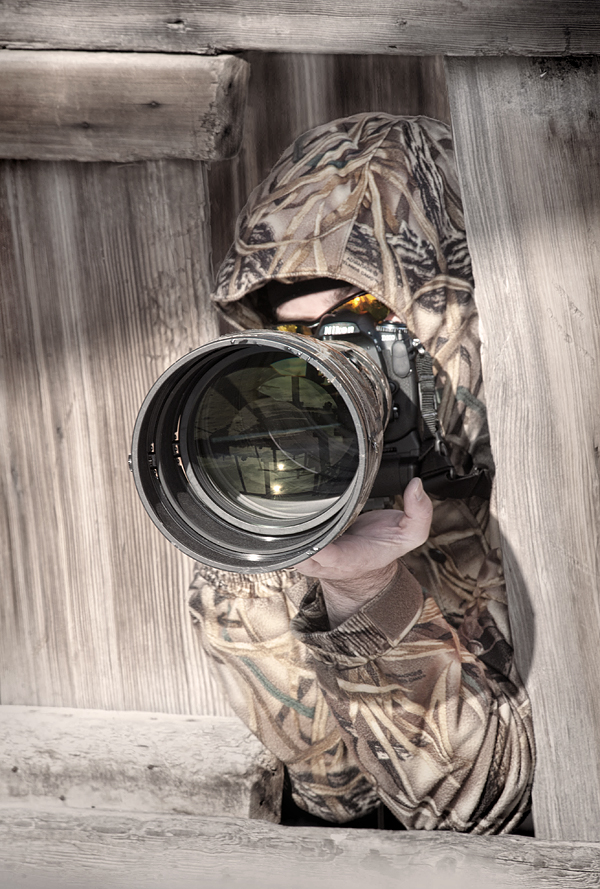
Shooting the Gap

( Photo of me: www.jaymorr.com, Post: Me)

My View:
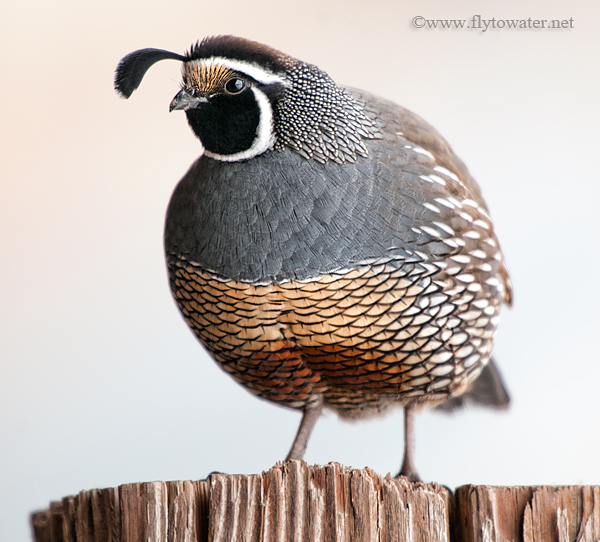
California Valley Quail - Side Light

California Valley Quail
Nikon D300, f/8, 1/125
Nikon 400mm f/2.8 VR
Nikon TC20-EIII Teleconverter
Distance to Subject: 8 paces

Saturday, October 15, 2011

Kid Stuff

If you are more perceptive than I am, you might have noticed that there is occasional fly fishing content on this blog.  Such an observation might lead a person (not that I am referring to any type of spousal unit here) to the mistaken belief that all I do is fish.  Nothing could be further from the truth.  I only mostly fish.

Take this morning, for example.  I had the mandate opportunity to accompany my niece to her last soccer game of the season.  At six years old she is considerably better at fĂștbol than Uncle Fly to Water, so I brought along the camera to get a couple shots of her in action.

Whether it's team sports, fly fishing, or portraiture there are two basic fundamentals of composition that are helpful to keep in mind when photographing kids.

The first seems obvious but I'm surprised how often it's overlooked.  Children are classified scientifically as short people, or stubby sapiens if you want to get technical.  Adults taking pictures of kids usually don't bother to kneel or sit on the ground so as to shoot from eye level.  Dropping down will often result in the heartbreak of grass-stained jeans, but a level perspective gives the subject more prominence.

Secondly, as with most portraits, it's important to align the child's eyes with the upper third of the frame.  This is a fundamental of the Rule of Thirds that helps the viewer connect more intuitively to the subject.

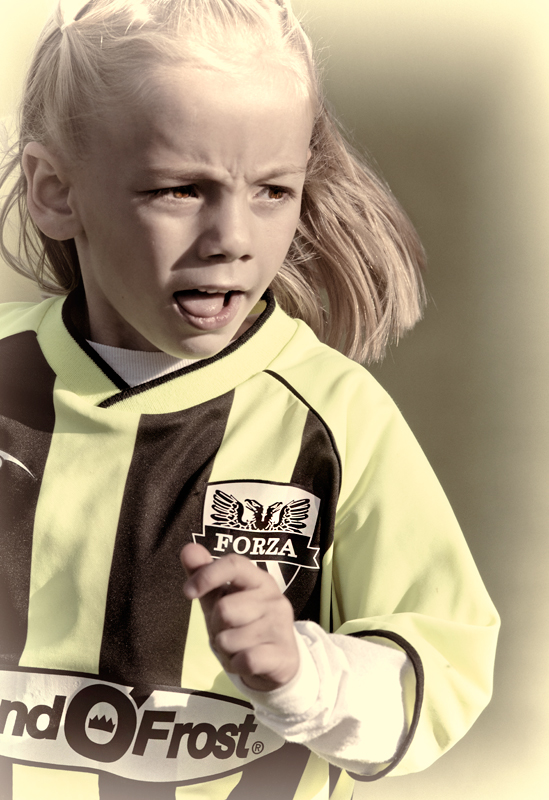
Sarah - Team Lemonheads

This photo was taken at 8x optical magnification and f/5.6, which is well within the range of nearly all point & shoot cameras.  The reasons I like this image are purely compositional and result from several concious choices:
  • Positioning the camera at eye level
  • Including story-telling elements (expression, jersey, implied motion)
  • Excluding distracting elements (other players, chairs along the sideline, goal posts, etc.)
  • Alignment of the eyes along the upper third of the image (Rule of Thirds)
A repeatable recipe for fun kid shots is to get low, and simplify the image by leaving out anything that doesn't need to be there.

I really did have a great time at the game this morning and it was my privilege to be cheering for the Lemon Heads (as they call themselves).  For the most part I hardly thought about my Sage One 796-4 fly rod that needs to get bent very, very soon by some slab-like salmonids.

Saturday, August 20, 2011

Loaded for...Chipmunk

On a recent hike into the backcountry looking to photograph elk, I decided to carry the Boomstick - a Nikon 400mm f/2.8 AF-S VR lens. When I say "carry" I don't mean in a backpack or harness, I mean freehand.

With camera and grip attached, this rig weighs in around 13 pounds. I often carry this lens without a pack, and shoot it hand held. Mature bull elk in areas where hunting is prevalent are a cagey bunch, and opportunities can last only seconds.

In this case, however, I hiked over an area roughly the size of the Louisiana Purchase and didn't catch a single glimpse of elk hide.

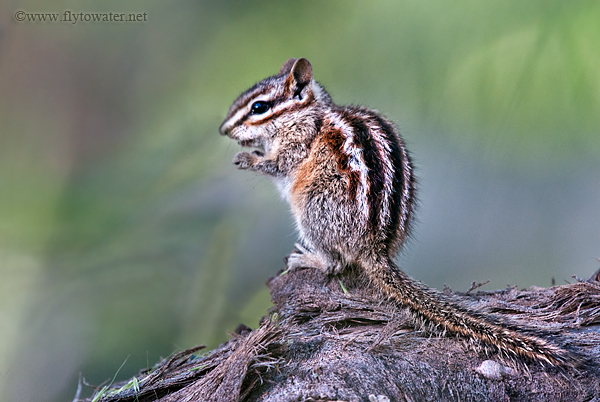
As I was making the steep descent back to the vehicle, I came across a common Least Chipmunk, neotamias minimus.

A few things jumped out at me when I spotted this little guy.
  • He was facing towards the sun, allowing for the all-important catch light to be reflected in his eye. This is a small detail that is always on my mind when photographing animals.
  • The chipmunk was positioned on a log that would give the foreground some texture, as well as a little elevation from the grasses on the forest floor.
  • Most interesting was the pattern of pine needles and leaves in the foliage beyond the perch. I immediately knew this would make for a soft, dappled, pleasing background.
When looking to capture an image of a relatively common subject, consider ways you can make the rest of the frame uncommon. Foreground, background, texture, and details like catch light are great ways create engagement with the viewer.

The final step involved compositional fundamentals.
  • It is key in wildlife portraits to shoot at eye level. I had to get very close to the ground to accomplish this, but it's important because downward angles in photography weaken the subject's presence in the image.
  • The chipmunk's eye is located 1/3 of the frame from the top edge, which is a foundational element of the Rule of Thirds as it applies to portraits.
  • Lastly, I chose a position that allowed the chipmunk's tail to enter at the corner, creating a natural leading line for the eye to easily follow into the photo.
When getting outfoxed by the day's primary objective - improvise and look elsewhere. The practice pays off when the main event suddenly shows up, and all these fundamentals need to be more instinctive and less deliberate.

Snacking Chipmunk

Nikon D300
Nikon 400mm f/2.8 AF-S VR (hand held) - f/5.6, 1/250
LensCoat Camoflauge
Equivalent Optical Magnification: 8x
Sitka Gear Open Country Camo
Distance to Subject: 20 feet

Monday, April 25, 2011

PhoDOGraphy

A week ago I enjoyed the opportunity to attend a field trial event held in Utah by the National Vizsla Association (NVA). Since this was a formal, judged event there were not many opportunities for photography, but it was a great experience to see some extremely well-trained pointers in action.

While there I was speaking with a trainer who was interested in capturing better images of dogs in the field. The first question that came up was, "What is the most important piece of equipment that makes the biggest difference?"

My response was simple - "Your kneecap."

I went on to explain that the biggest mistake most people make when photographing dogs is to shoot standing up, creating a strong downward angle from the camera to the subject.

In 2-dimensional space, a downward angle makes the subject appear less prominent as it occupies a weaker position within the frame. The next time you see one of those campaign ads about dogs and cats that are in need of rescue, take note of the camera angle. It will always be high, looking down at the animals to create a feeling of helplessness and dependence. This is done intentionally. Typically these are the qualities you want to avoid in photographing sporting breeds where strength, athleticism, power, and confidence are the elements we are seeking to portrait.

Kneeling down and lining up the lens at eye level is the key to creating a strong, powerful presence for subjects like hunting dogs.

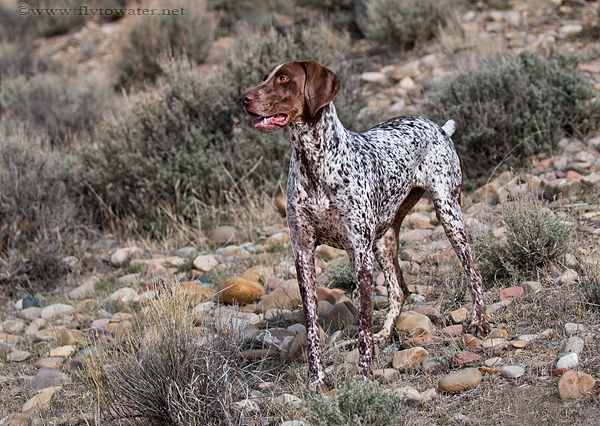
Brika in the Light

On Saturday while fishing in Wyoming I took a few shots of Brika (my favorite German Shorthaired Pointer that I don't own myself) to illustrate. Dropping to one knee poses a few problems out in the sticks where mud, cactus, rocks, and all manner of detritus usually make kneeling a real pain in the patella. Regardless, perspective is always paramount and foremost in my mind when looking to capture man's best friend.

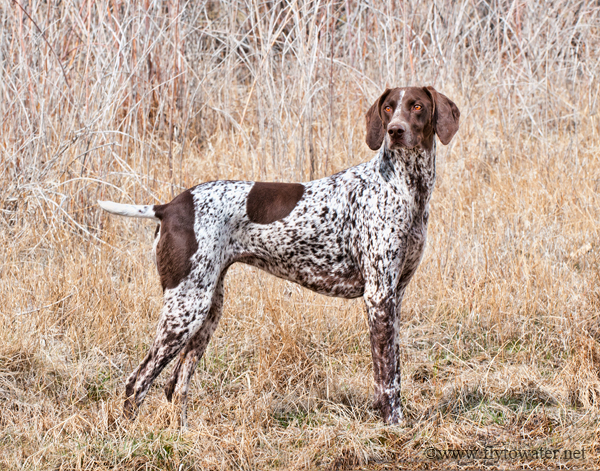
Brika in the Willows

Getting low and shooting at eye level will give your pup a more commanding presence in the photo and create a stronger connection with the viewer. The photographer's willingness to mess up a nice pair of jeans and hork down ibuprofen for a few days after the shoot makes a bigger difference than any choice of gear.