Saturday, July 28, 2012

SOG Trident

Fishermen and sportsmen in general tend to be blade-intensive personalities.  I am no different and over the years have accumulated roughly the bulk of an adolescent pachyderm in knives.

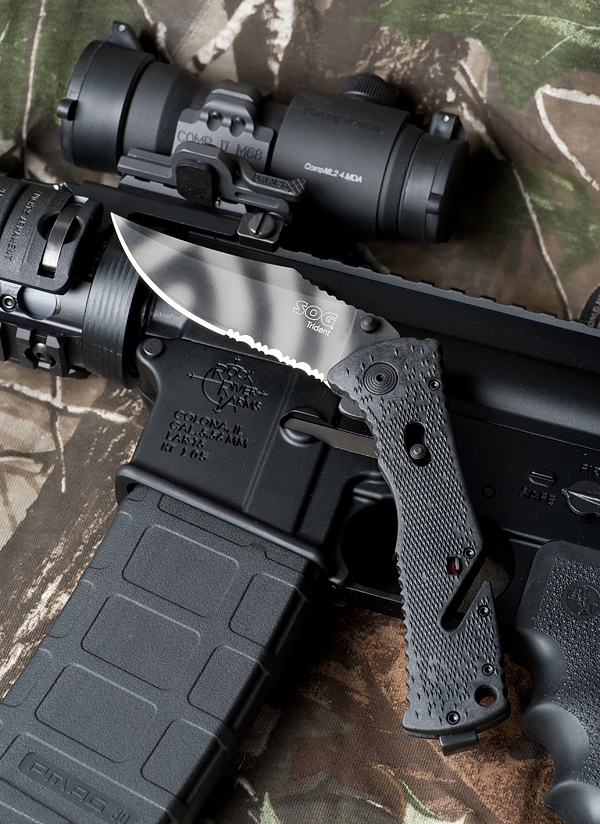
One of my favorites for all around use is the SOG Trident, which is available in a variety of finishes.  The tiger stripe version is particularly badass.

SOG Trident Tiger Stripe

Not only is this model a great size for EDC (every day carry), but it's perfect as a fishing, camping, or hunting implement.  I also really like keeping a Trident in each of my vehicles because it's an outstanding emergency tool.  The notched handle creates an ideal seat belt cutter, and the butt where the pocket clip attaches is robust enough to use for breaking glass if needed.

The handle is Zytel, which is a light weight polymer that affords an easy grip wet or dry.  Partial serration of the blade again adds to the versatility.  SOG has also incorporated an assisted opening mechanism making one-handed access to the blade very snappy.  A safety is present as a precautionary measure, locking the blade in the closed position when not in use.

SOG Trident Tiger Stripe - Vert

Going price: About $59 bucks - a nice bargain for an edge with this many applications.

Monday, March 5, 2012

Soft Water

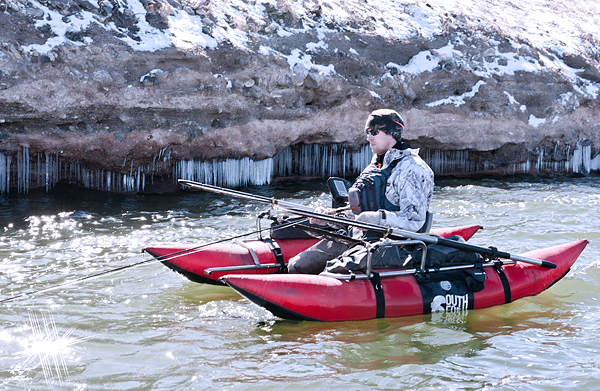
We interrupt our regularly scheduled programming, because it's frankly still hard to believe that for the past several weeks I have been fly fishing mid-elevation stillwaters in Utah.  During February.  No ice holes required.  As in casting a fly line and having its entirety land on liquid where there would normally be 14 inches of solid ice right now.

The Hell you say?  Well, in all past years of my lifetime you would be entirely correct in calling BS - but not THIS year.  Hungry trout have been tearing the chenille off my flies right down to the bare hook because no one has told them there's another month of Winter supposedly going on right now.

Icicles

It has been butt-numbing cold at times, but this is OPEN WATER we are talking about.  The cure to cabin fever. 

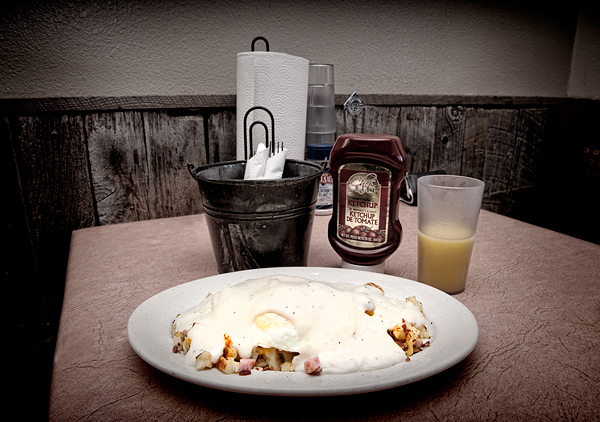
Not only that but in the town of Circleville a guy named Mike, proprietor of Butch Cassidy's Hideout, makes something called a Hash Stack.  It's a conglomeration of hash brown potatoes, ham, sausage, bacon, and 2 eggs smothered in country gravy.  One eats this breakfast, and then fishes all day with  no additional nutrient requirements.

The Hash Stack

Early in the season I am giddy to fish and don't spend much time behind the lens. While rivers are certainly available all Winter long, stillwater trout on the fly at 6,500 feet in February... it's just unheard of.

Here's to places of extremes.  See you on the water.

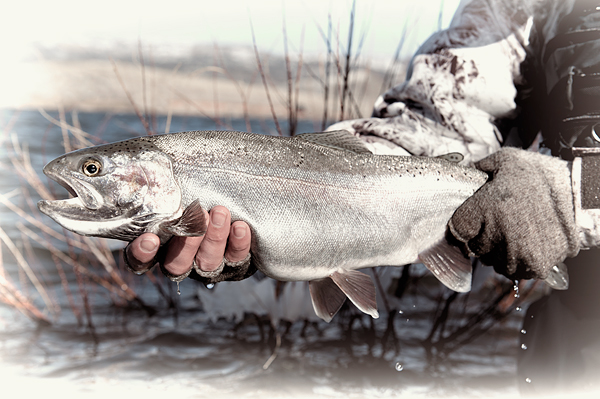
Hen Rainbow at Ice Off

Thursday, February 23, 2012

Apocalyptic Fishing II

Alert!  303 days remain until the end of the Mayan calendar on December 21st.  Yes, some experts do believe it's actually December 23rd, in which case we still have a very comfortable 305 days left.

It is now time for the second installment of Apocalypse Gear - the feature that helps you, the angler, prepare for zombies.  Today's episode is a double feature, and starts out with rod selection.

You'll want to travel light with the undead roaming freely around your favorite waters, so it may make sense to select just one fly rod that can do it all.  My pick is the aptly named Sage One, in a 796-4.  This stick will handle everything - trout, steelhead, muskie, bass, salmon - and it won't shun light saltwater duty either.  As an added bonus, the rod tube is solid enough to use as a bludgeon and will never give your position away with unwanted reflections due to the matte black coating.

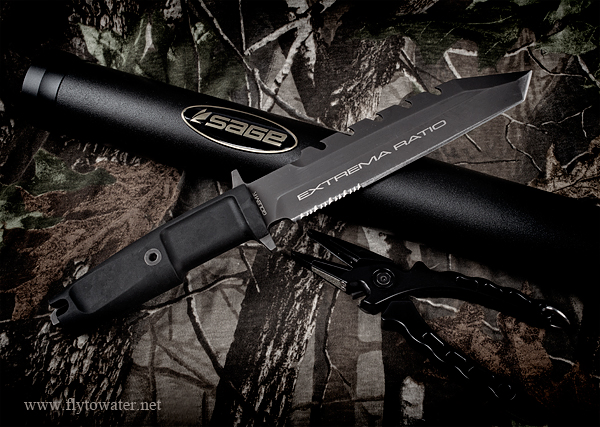
Extrema Ratio 58 HRC Golem


It's a good idea, even pre-doomsday, to have access to a few handy pieces of cutlery when in the outdoors.  As survival knives go, I haven't found anything better than the Extrema Ratio Golem for taking into the back country.  The blade is 58 HRC stainless cobalt steel, an alloy that is often used for cutting other steel.  It stands up very well to chopping and prying, where knives that focus strictly on sharp edges often fall short.  The Golem has a tanto point, and the blade is partially serrated making tasks like rope cutting a snap.  It also offers a robust dorsal saw that, while definitely requiring some effort, cuts very well.  Even the lanyard loop is a solid piece of hardware than can be used for striking, glass breaking, etc.

Parry...Parry...Thrust...Cast  - Good!

Friday, February 17, 2012

Apocalyptic Fishing

As Fly to Water has alertly reported in several recent posts, the Mayan calendar ends this year.  The most likely cause of this situation is that the company building the calendar misrepresented it's financial statements, resulting in dramatic stock price deterioration and subsequent layoffs.  All of the Mayan executives, or chiefs, retired to the Caymans.  Calendar-building laborers were then faced with a large spike in temple foreclosures and ultimately relocated, leaving all the post-2012 work unfinished.

Alternatively, some kind of zombie apocalypse is going to take place this December.  The dead rising from the grave, human sacrifice, dogs and cats living together...MASS HYSTERIA.

While the media has buried its teeth in this topic like a gila monster on ankle flesh, the most important consideration has been totally ignored: How are we going to fly fish when the end of days arrives?

As a public service, I hereby offer up a series of posts containing gear ideas and recommendations for apocalyptic fishing.

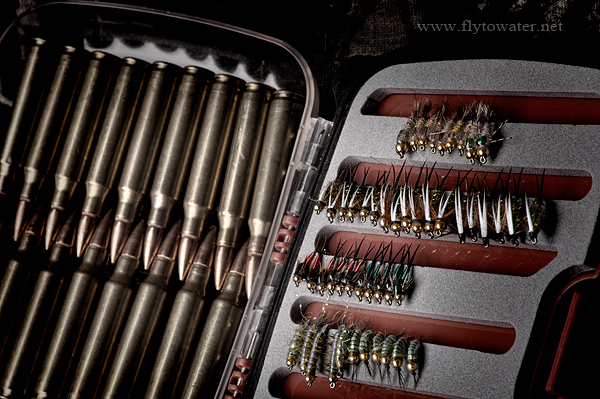
Apocalyptic Fishing - 5.56 Nato Edition

First and foremost - at the moment of truth you don't want the heartbreak of reaching for your ammo and pulling out your flies instead.  My world's first concept combines a waterproof fly box with 5.56 Nato assault rifle ammunition.  One swift grab into the sling pack, and you've got access to Copper Johns and copper-jacketed .223 hardball.

Get some!

Sunday, February 5, 2012

R.O.U.S.

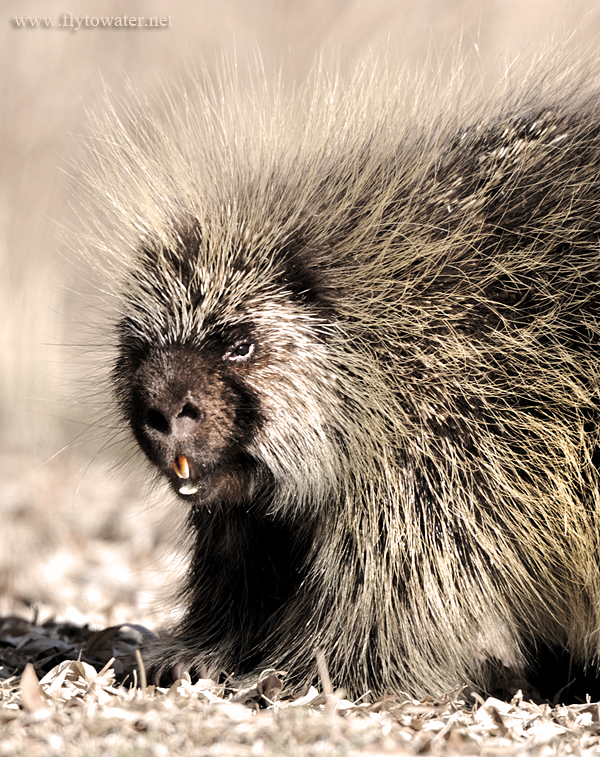
If you are a dog owner you know that one of the 3 perils of the uplands is the North American Porcupine, or Rodent Of Unusual Spikiness.

R.O.U.S.

Having a pup get a face full of quill pig is no fun, as I can personally attest.  Yesterday I was out in the field without dogs, looking for raptors with JayMorr.  When you don't have to worry about your pointers, these can be fascinating creatures to watch.

Sticky Situation

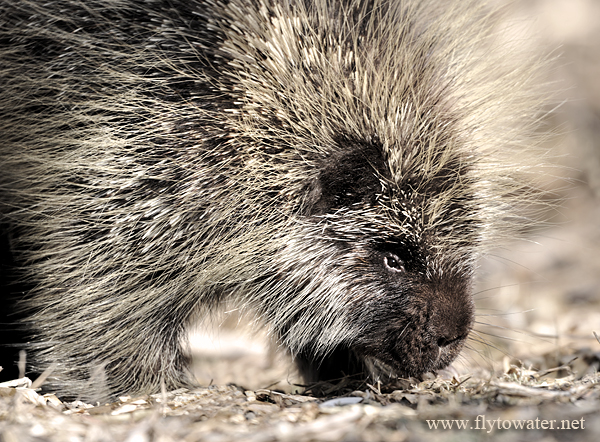
Ambling about in the unconcerned manner of an animal coated in acupuncture needles, Porky is easy to approach.  While the concept that quills can be launched is a myth, porcupines still have a chip on their shoulders because they place 3rd on the list of large rodents behind the capybara and beaver.  No one likes to be number three.  Use a little caution - as they will swat you with their tails if given the opportunity.

As wildlife goes, the quill pig is a relatively easy subject to photograph once located.  The main consideration is not to be lazy and fire away from a standing position (which creates an awkward, downward-looking perspective).  Go ahead and get dirty.  Sitting, laying on your side propped up with an elbow, or going prone are all options that will put you at eye level with the subject for a more engaging image.

Porcupine Portrait

It's hard to believe it's February out there with highs in the 45° F range, no snow at mid-elevations, and copious sunshine while it should be the dead of Winter.  I for one am not complaining.


Monday, January 16, 2012

Getting Started in Photography - Part 3

This week the eyes of world have been on CES, or the Consumer Electronics Show.  A huge part of the proceedings involves photography equipment which will allow you to get unprecedented shots of awesomeness.  Sadly, without the latest gadgets, your imagery is doomed to becoming a festering pile of digital offal.

In this installment of GSiP, Fly to Water saves you the cost of a brand spanking new Nikon D4 and spills the beans on how to get excellent, close-up shots of wildlife by:

Getting Close Enough to the Wildlife

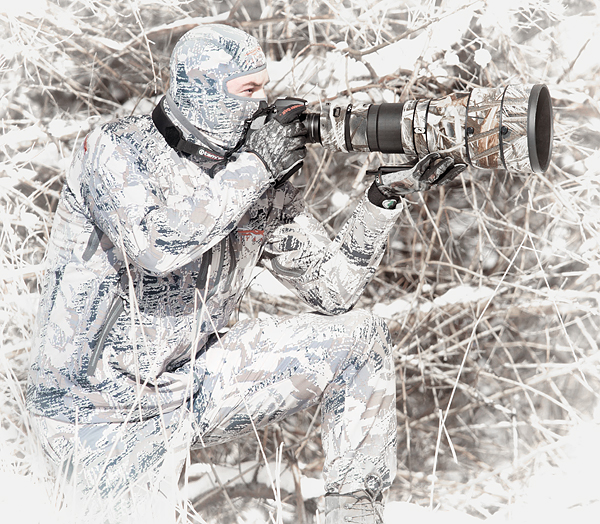
Snowblind

(Photo of me: www.jaymorr.com, Post: Me)

One of the biggest misconceptions out there is that prime lenses, like spotting scopes, are designed for high magnification.  It's wishful thinking.  Baboons probably wish they didn't have those garish, red asses all the time but it doesn't change anything.  Expensive glass is actually designed around a very large aperture, which allows more light into the camera and therefore expands the range of conditions that can be dealt with by the photographer.

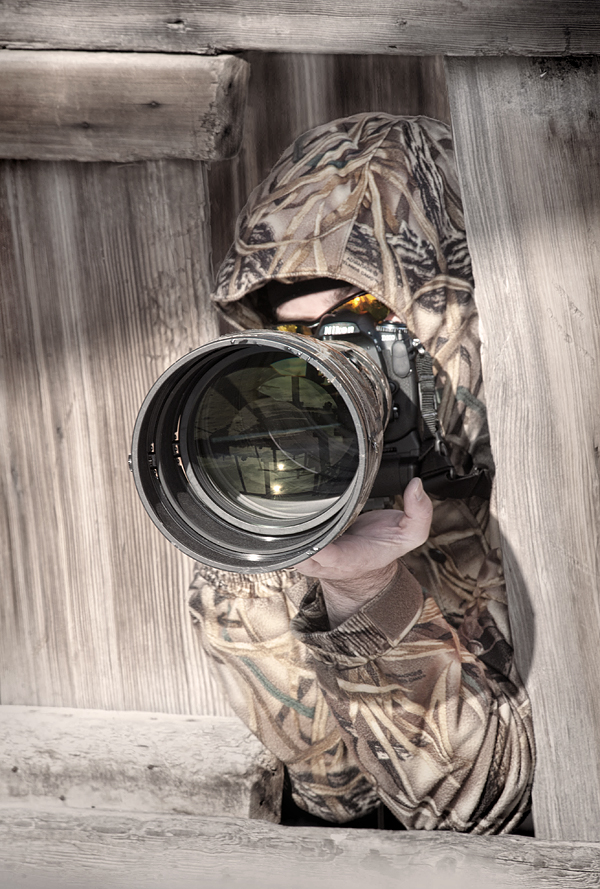
In these posts I've tried to offer some low-cost suggestions that helped me greatly in learning how to advance my outdoor photography.  The single, most significant improvement you will ever see in your wildlife images will come from learning how to get closer.  Gear is nice, and over time you will find yourself upgrading.  Here's the bottom line: My best wildlife images have come from my closest encounters with wildlife.  A few weeks ago I captured my all-time favorite image a of a chukar partridge.  I was 6 steps from the bird, in good light.  The result would have been great with any SLR and 300mm lens, or point and shoot with 6x optical zoom.

The motif you might be noticing is: WORK.  There is no EASY button or quick fix.  It will take a lot of time and patience - patterning and stalking animals involves skills which must be developed and practiced.  Effort and dedication provide the pay off - everything else is secondary.  The best advice I can give:

Find a place where your subject wants to be, and habitually frequents.  Get there first, and wait.  It's that simple, and that complex.  Many are unprepared for the time investment.  As a somewhat general rule, the average is probably close to 1 good opportunity per full day in the field with wild subjects.  Understand that, and have realistic expectations.  Your commitment will pay dividends.

Bird's Eye View:

Shooting the Gap

( Photo of me: www.jaymorr.com, Post: Me)

My View:

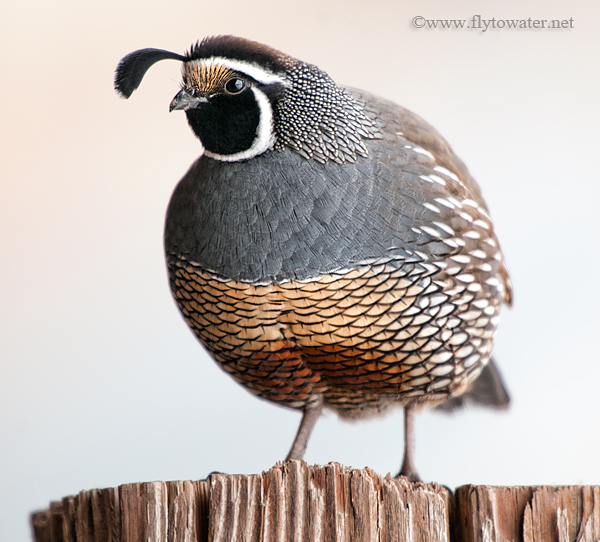
California Valley Quail - Side Light

California Valley Quail
Nikon D300, f/8, 1/125
Nikon 400mm f/2.8 VR
Nikon TC20-EIII Teleconverter
Distance to Subject: 8 paces

Saturday, January 14, 2012

Getting Started in Photography - Part Two

As Fly to Water alertly reported in our last installment, the world is anxiously awaiting events foretold by the ancient Mayan civilization in late 2012: Announcement of the Nikon D400 SLR.

In the meantime we all need to find constructive ways to occupy ourselves, which is why I am now threatening to demystify camera controls in part 2 of this wildly popular feature that has been read by not less than 1 resident of Gilbert, Arizona.

The main functions of a modern digital camera are difficult to understand due to: Math teachers.  Individuals identified through psychological examination as having a certain moral indifference will often select a career in mathematics.  It's not easy to fathom, but during key formative years children K-12 are exposed to fractional numbers.  No one knows why math has been chosen to blight an otherwise pleasant educational experience, but apparently it's been happening since the days of Peking Man.  Well into adulthood such trauma is often repressed, and fractions are avoided.

Aperture and shutter speed values, being fractional numbers, create unsavory flashbacks to things like reciprocals, numerators, and denominators.  Happily, it's all pretty easy stuff when you boil it down - much as the Frobenius Method simplifies finding an infinite series solution for a second-order ordinary differential equation of a given form.

Images are destinations, and cameras are the vehicles that take us there.  Just like a car, there are only a handful of really important controls that will come into play with high frequency. 


A – Aperture: Controls Depth of Field.  Settings are fractional numbers called f/stops.  The smaller the number, the larger the aperture.   In other words, ½ or f/2 is a bigger aperture than ⅛ or f/8.  Settings such as f/2, f/3.5, or f/4 are large, while small apertures are f/16, f/22 etc.  Large apertures give you shallow depth of field where the subject is in focus, but everything else is not.  Small apertures give deep depth of field (both foreground and background in focus).  Use large apertures for portraits where you want only the subject to be in sharp focus.  By contrast landscape images require both the foreground and background to be clearly visible, so you want to select a small aperture.

S – Shutter Speed: Controls Motion.  Fast shutter speeds freeze motion, slow shutter speeds blur motion.  Use this setting when you have a moving subject.  For sports, shutter speeds of 1/500 will freeze motion, while 1/100 will blur the action.  Capturing fast-moving subjects like birds in flight requires shutter speeds of 1/1000 or faster.  You can also employ very slow shutter speeds (1/4, 1/8, 1-sec) to intentionally blur moving water.  To use very slow shutter speeds, you also need to stabilize your camera on a tripod.

M – Manual: Aperture and Shutter Speed are Controlled by the Photographer.
  Use this setting when you need precise control of both depth of field and motion.  Manual mode has a wide variety of highly applicable uses depending on your own personal style.  I use it extensively when employing off-camera lighting, as one example.  It's less intimidating than you might think because most cameras have a bar chart on the display that tells you if the image is over/under exposed.  All you have to do is center the exposure and adjust as needed.

AUTO MODE/CAMERA CASTRATION: As with seemingly all modern electronics, many fine efforts have been made to allow the equipment to make decisions for the user.  These days Auto/Program modes do a great job of evaluating a scene and recommending a proper combination of aperture and shutter speed to expose the image correctly.  The problem is that the camera has no way of knowing what the creative intent of the photograph is supposed to be.  Going straight to the point: If you want to improve your imagery - forget Auto mode.  Take control of the tool, and make conscious decisions in order to obtain intentional results as opposed to guesswork.

WB - White Balance: Cameras need to know what is neutral (gray) in order to correctly interpret colors.  This control probably should have been called something like "color balance" but as you can see we are sticking with confusing terminology throughout.  Here's the bottom line: If you don't like the way colors are looking on your LCD, you probably need to adjust the white balance.  Once you understand this principal it seems very intuitive.  When someone is standing in the shade, there are more blue tones present.  In direct sunlight, tones are warmer with more reds and yellows.  Many cameras do a very good job of automatically determining what the WB should be, but it's a setting that can also be used creatively.  Using a shade white balance (adding red) to photograph Southern Utah red rock landscapes is one example.  The following modes are probably present on your camera.  Use them and see what they do:


Probably the most valuable book I read in the early going on this topic was Understanding Exposure by Bryan Peterson.  It's about $17 bucks in hard copy, and simplified several concepts that had previously seemed hazy to me.