Monday, January 16, 2012

Getting Started in Photography - Part 3

This week the eyes of world have been on CES, or the Consumer Electronics Show.  A huge part of the proceedings involves photography equipment which will allow you to get unprecedented shots of awesomeness.  Sadly, without the latest gadgets, your imagery is doomed to becoming a festering pile of digital offal.

In this installment of GSiP, Fly to Water saves you the cost of a brand spanking new Nikon D4 and spills the beans on how to get excellent, close-up shots of wildlife by:

Getting Close Enough to the Wildlife

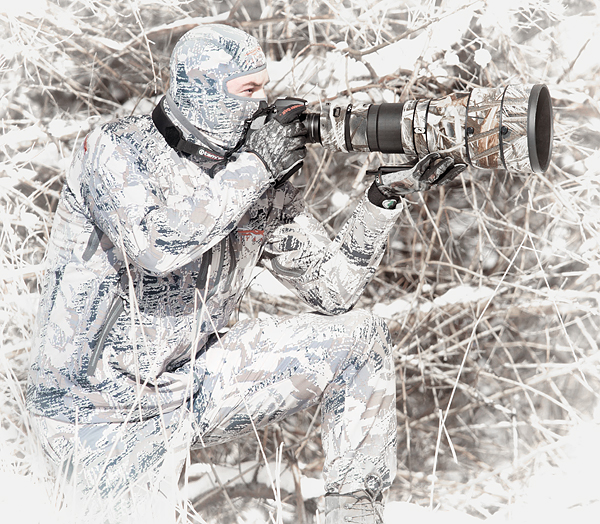
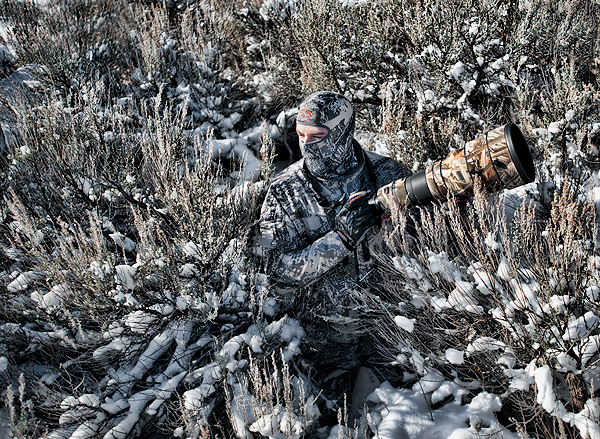
Snowblind

(Photo of me: www.jaymorr.com, Post: Me)

One of the biggest misconceptions out there is that prime lenses, like spotting scopes, are designed for high magnification.  It's wishful thinking.  Baboons probably wish they didn't have those garish, red asses all the time but it doesn't change anything.  Expensive glass is actually designed around a very large aperture, which allows more light into the camera and therefore expands the range of conditions that can be dealt with by the photographer.

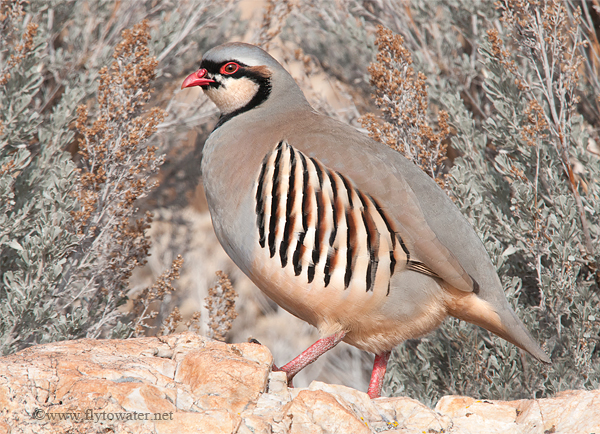
In these posts I've tried to offer some low-cost suggestions that helped me greatly in learning how to advance my outdoor photography.  The single, most significant improvement you will ever see in your wildlife images will come from learning how to get closer.  Gear is nice, and over time you will find yourself upgrading.  Here's the bottom line: My best wildlife images have come from my closest encounters with wildlife.  A few weeks ago I captured my all-time favorite image a of a chukar partridge.  I was 6 steps from the bird, in good light.  The result would have been great with any SLR and 300mm lens, or point and shoot with 6x optical zoom.

The motif you might be noticing is: WORK.  There is no EASY button or quick fix.  It will take a lot of time and patience - patterning and stalking animals involves skills which must be developed and practiced.  Effort and dedication provide the pay off - everything else is secondary.  The best advice I can give:

Find a place where your subject wants to be, and habitually frequents.  Get there first, and wait.  It's that simple, and that complex.  Many are unprepared for the time investment.  As a somewhat general rule, the average is probably close to 1 good opportunity per full day in the field with wild subjects.  Understand that, and have realistic expectations.  Your commitment will pay dividends.

Bird's Eye View:

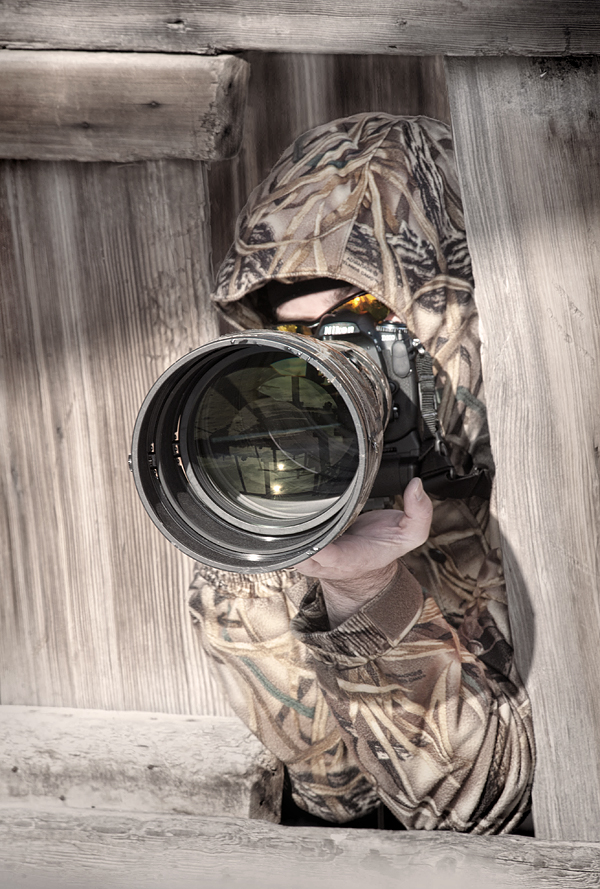
Shooting the Gap

( Photo of me: www.jaymorr.com, Post: Me)

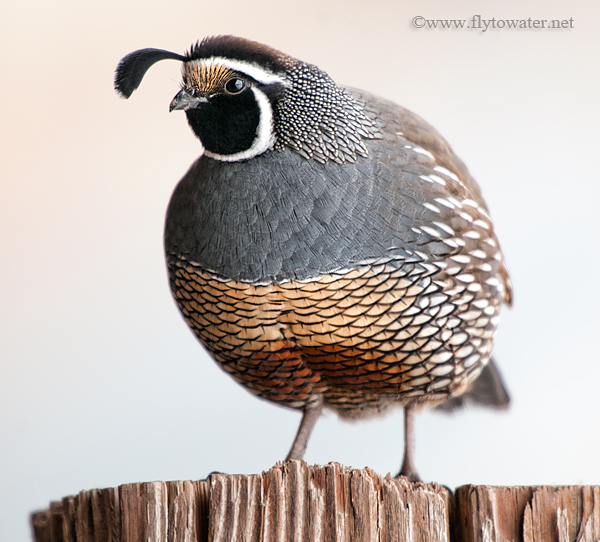
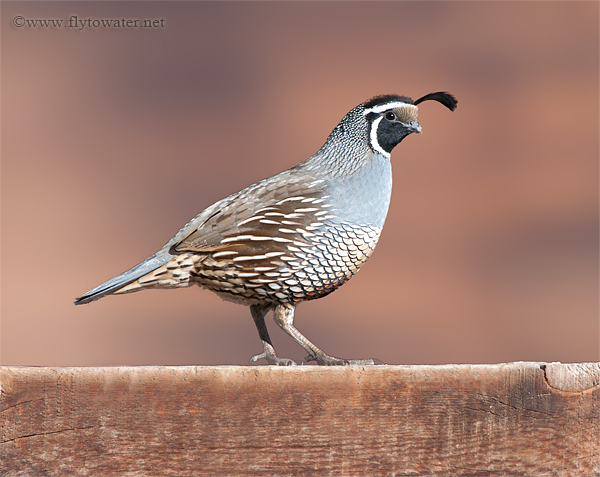
My View:

California Valley Quail - Side Light

California Valley Quail
Nikon D300, f/8, 1/125
Nikon 400mm f/2.8 VR
Nikon TC20-EIII Teleconverter
Distance to Subject: 8 paces

Saturday, January 14, 2012

Getting Started in Photography - Part Two

As Fly to Water alertly reported in our last installment, the world is anxiously awaiting events foretold by the ancient Mayan civilization in late 2012: Announcement of the Nikon D400 SLR.

In the meantime we all need to find constructive ways to occupy ourselves, which is why I am now threatening to demystify camera controls in part 2 of this wildly popular feature that has been read by not less than 1 resident of Gilbert, Arizona.

The main functions of a modern digital camera are difficult to understand due to: Math teachers.  Individuals identified through psychological examination as having a certain moral indifference will often select a career in mathematics.  It's not easy to fathom, but during key formative years children K-12 are exposed to fractional numbers.  No one knows why math has been chosen to blight an otherwise pleasant educational experience, but apparently it's been happening since the days of Peking Man.  Well into adulthood such trauma is often repressed, and fractions are avoided.

Aperture and shutter speed values, being fractional numbers, create unsavory flashbacks to things like reciprocals, numerators, and denominators.  Happily, it's all pretty easy stuff when you boil it down - much as the Frobenius Method simplifies finding an infinite series solution for a second-order ordinary differential equation of a given form.

Images are destinations, and cameras are the vehicles that take us there.  Just like a car, there are only a handful of really important controls that will come into play with high frequency. 


A – Aperture: Controls Depth of Field.  Settings are fractional numbers called f/stops.  The smaller the number, the larger the aperture.   In other words, ½ or f/2 is a bigger aperture than ⅛ or f/8.  Settings such as f/2, f/3.5, or f/4 are large, while small apertures are f/16, f/22 etc.  Large apertures give you shallow depth of field where the subject is in focus, but everything else is not.  Small apertures give deep depth of field (both foreground and background in focus).  Use large apertures for portraits where you want only the subject to be in sharp focus.  By contrast landscape images require both the foreground and background to be clearly visible, so you want to select a small aperture.

S – Shutter Speed: Controls Motion.  Fast shutter speeds freeze motion, slow shutter speeds blur motion.  Use this setting when you have a moving subject.  For sports, shutter speeds of 1/500 will freeze motion, while 1/100 will blur the action.  Capturing fast-moving subjects like birds in flight requires shutter speeds of 1/1000 or faster.  You can also employ very slow shutter speeds (1/4, 1/8, 1-sec) to intentionally blur moving water.  To use very slow shutter speeds, you also need to stabilize your camera on a tripod.

M – Manual: Aperture and Shutter Speed are Controlled by the Photographer.
  Use this setting when you need precise control of both depth of field and motion.  Manual mode has a wide variety of highly applicable uses depending on your own personal style.  I use it extensively when employing off-camera lighting, as one example.  It's less intimidating than you might think because most cameras have a bar chart on the display that tells you if the image is over/under exposed.  All you have to do is center the exposure and adjust as needed.

AUTO MODE/CAMERA CASTRATION: As with seemingly all modern electronics, many fine efforts have been made to allow the equipment to make decisions for the user.  These days Auto/Program modes do a great job of evaluating a scene and recommending a proper combination of aperture and shutter speed to expose the image correctly.  The problem is that the camera has no way of knowing what the creative intent of the photograph is supposed to be.  Going straight to the point: If you want to improve your imagery - forget Auto mode.  Take control of the tool, and make conscious decisions in order to obtain intentional results as opposed to guesswork.

WB - White Balance: Cameras need to know what is neutral (gray) in order to correctly interpret colors.  This control probably should have been called something like "color balance" but as you can see we are sticking with confusing terminology throughout.  Here's the bottom line: If you don't like the way colors are looking on your LCD, you probably need to adjust the white balance.  Once you understand this principal it seems very intuitive.  When someone is standing in the shade, there are more blue tones present.  In direct sunlight, tones are warmer with more reds and yellows.  Many cameras do a very good job of automatically determining what the WB should be, but it's a setting that can also be used creatively.  Using a shade white balance (adding red) to photograph Southern Utah red rock landscapes is one example.  The following modes are probably present on your camera.  Use them and see what they do:


Probably the most valuable book I read in the early going on this topic was Understanding Exposure by Bryan Peterson.  It's about $17 bucks in hard copy, and simplified several concepts that had previously seemed hazy to me.

Friday, January 13, 2012

Getting Started in Photography - Part One

Here we are at the beginning of 2012, less than 12 months away from the END OF THE WORLD on December 21st according to the Mesoamerican Long Count Calendar.  As a major socioeconomic force, Fly to Water will now respond to these most weighty of matters by discussing: How I got started in photography.

In the Fall of 2005 I was contemplating a great truth: There were people who could take a quality photograph, and I was NOT one of them.  At the time my definition of "quality" was somewhat limited, but I knew that certain images were engaging, held my attention, and struck me as art.  By contrast my work was as attractive as an uncorked bung hole.

Of course I had the option of going out and buying a nicer camera than the Nikon D70 I was shooting, which would make an immediate difference by doubling the file size of my schlocky snapshots.  Oddly, many people believe in the mathematical formula E = GP², where E is an expensive camera and GP is a constant called "good photos."  I call this the Kopi Luwak delusion: You'd think I was making this up, but there are actual people who profess that because coffee beans are eaten by a civet cat and shat out in the jungle, they make a phenomenal beverage.  Now the civet cat is a fine animal, and my Nikon D70 was a solid camera, but it turns out both can be sorely misused.

This leads me to my point: Dudes are out there selling palm civet dingle berries for $160/lb. 
If you're getting started in photography or looking to improve prior to December's sweet release, consider this:
  • Anyone can take great photos, regardless of what you feel your natural talent/ability level might be.
  • You will need to work at it, with the same kind of dedication that it takes to sell cat crap coffee.
Very early on I came to the realization that successful images happened because of the human elements of photography.  More importantly, I began to discover that many of the qualities generally described as "artistic" were acquirable.  There were principals, camera controls, and techniques which could allow me to get the results I wanted - if I was willing to educate myself.

Step One: Composition

We live in a 3-dimensional world, and from the youngest of ages our minds are conditioned to connect with an environment that involves depth, distance, and perspective.

I was fascinated to learn that the human mind naturally imposes 3-dimensional thinking on flat, 2-dimensional images.  It turns out that fairly straight-forward guidelines exist which help broker the connection with the viewer.

In a general sense, this is called "composition," or the way in which objects are arranged (intentionally and creatively) within the frame. There is nothing about composition that should be left to chance. Inclusion, exclusion, angle of view, position relative to the subject(s), portrait vs. landscape orientation, foreground, background, and many other considerations play an enormous part in how the viewer will interpret a 2-dimensional image.

It took some reprogramming for me to begin seeing in 2 dimensions - actively thinking about how I would use the spacial relationships in the frame to hold attention rather than create distraction.

The topic is too broad to cover in a blog post, but here is the take away: Regardless of your equipment, there is a FREE way of making your photos more engaging with simple compositional techniques that can be learned and practiced at home.  I started by reading Photographic Composition, and Brenda Tharp's excellent Creative Nature and Outdoor Photography - both available on Amazon for about $15 bucks.

Read up before 12/21/12, when it will be human sacrifice, dogs and cats living together... MASS HYSTERIA.  If this has been helpful, drop me a line.  I've got a few more pre-cataclysm thoughts brewing.

Sunday, January 1, 2012

Chasing Quail

When all else fails...NEW TACTICS.

Around Thanksgiving I wrote HERE about a covey of jittery, rural quail that have unabashedly given me the bird for years.  This group and I have a certain understanding: I foolishly attempt to approach them, and they in turn show me their asses at 100 yards.  It's not an equitable arrangement. 

As the new year approached, I began wondering if a tried and true upland hunting technique - using a blocker - might work on the photo front.  Thinking back, I believe my wildlife photography has benefited greatly from a lifelong background as a sportsman.  Understanding animal behavior patterns, body language, vocalization, and other factors seems to provide me at times with an edge behind the lens.  The idea of pushing/blocking upland game is not new, but shotguns have an effective range of about 50 yards - a distance that needs to be cut in half with a camera.  Still, it was a concept that seemed worth testing out.

I gave Jason Morrison a call, and the game was afoot.  Jay is a guy who I knew had the skill to nail a fleeting opportunity that would last only seconds.

Arriving at the scene, an old farm in Northern Utah, I was disappointed to find that the birds did not pass the night in their usual spot.  It was a downer, because the golden light of morning created a perfect stage upon which there were no performers. Preparing to seek other possibilities, we suddenly noticed the covey near an old corral that had not seen use in ages.  It was at this point that long experience with upland birds kicked into gear, and I knew even before our approach that the situation was ideal.

It was my feeling that the covey, upon seeing my voluminous biomass heading in their direction, would sprint along the corral's contour for some 75 yards.  Here, they would reach a dead end and begin flying up onto some aged fencing and an old, rock wall.  Doing so would give them an escape route to the wheat fields beyond.  If Jason could position himself near this natural collection point in advance, he would have front row seats as 30 quail paraded past him at about 8 paces.

Morrison took the road less traveled, going far out of his way and remaining concealed from view until he eventually circled back about 20 minutes later and got into position.  I knew the birds wouldn't let me get close, so in the meantime I dug out my Nikon TC20-EIII, a 2x teleconverter that would double the focal length of my lens.

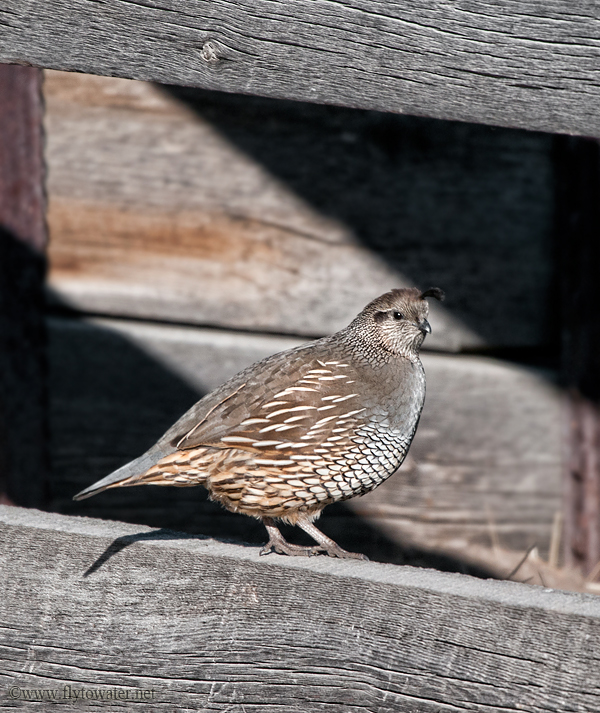
Getting the ready signal from Jay, I emerged from cover and vectored towards the corral.  I say "vectored" because it's something of an art to advance on animals without appearing as if you are necessarily headed directly at them.  It's one of those "look casual" things.  As the pusher, I carefully observed the birds in the covey to watch for signs of nervousness, and paced myself to avoid a flush.  The quail moved deliberately, but not in a panic, towards the blocker position.  A few stragglers occasionally tried to double back, and afforded me several medium distance shots from perhaps 20 yards.

Male California Valley Quail - Fence Rail

Female California Valley Quail - Barn Wood

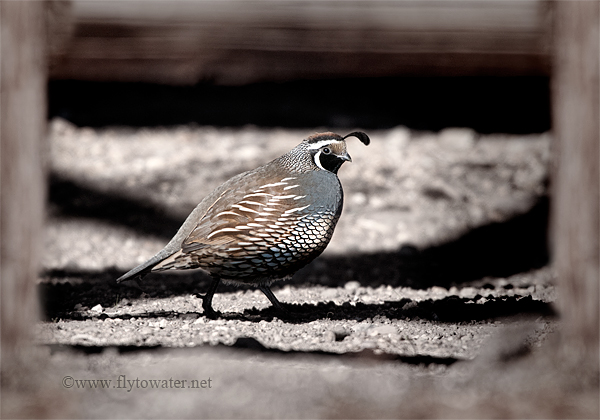
At one point I was able to lie down and capture a unique image as this male passed into a natural frame created by the bottom rail of the corral and 2 posts.  Shadows from the fencing formed a number of leading lines, drawing the eye towards the well-lit subject:

Male California Valley Quail - Framed by Old Fence

The day nearly ended in tragedy as JayMorr encountered a rare, silent killer: A quail stampede. 60 tiny feet, possibly descended from the velociraptor's, bore down on the blocker position.  From my perspective the whole thing wound up looking like some kind of avian flash mob dancing a Spanish Flamenco around Jason.  True to form he did not miss the opportunity.  Be sure to drop in and see some of his fantastic imagery - shot from 8 paces (HERE).  If you haven't attempted to photograph wild, rural game birds - it's difficult to articulate how extraordinary a situation like this really is.  The aggregation of great light, point-blank subjects, correct position relative to the sun, and very little time to work with all combine to make Jay's photographs remarkable.  It was the ideal way to spend New Year's.  A big congrats to Morrison on his first wild California Valley Quail images, and all the dues that were paid leading up to the moment.

Nikon D300
Nikon 400mm f/2.8 VR - f/8, 1/320, ISO 400
Nikon TC20-EIII Teleconverter
Distance to Subjects: 60 Feet/20 Yards

Tuesday, December 27, 2011

Devil Birds

I had been hiking for a while now.  The ambient temperature was 14° F (-10° C), which was comfortable.  A few years ago my outdoor wardrobe experienced some natural base layer enhancement courtesy of merino wool, which is a miracle fiber.  Like your garden variety wool it insulates even when wet, but against the skin it does not itch and feels like fleece.  Inexplicably it can also stave off odors for a remarkable amount of time, and it breathes extraordinarily well.  I was glad to have my Icebreakers on this occasion.  Incidentally, if you are one of my fly fishing readers, merino socks by this company are the dog's bollocks (meaning badass in the UK) for cold weather wading.

Chukar partridge were my goal for the day.  Early in the Fall it's often possible to locate a covey by listening for calls, but typical of this time of year it was dead quiet.  Wild birds soon realize their chatter is giving them away, and they start dishing out the silent treatment.

Hiking in the steep, rocky talus that chukars love with a 14-pound camera rig offers a pucker factor of about 9.0.  Opportunities can be so unexpected and fleeting, I've never been able to successfully make use of a tripod, monopod, harness, or pack.  It's all free-hand.  At double the weight of a typical shotgun, and with the awkward size/shape of a big telephoto, the visual is like watching someone Riverdance on a cliff face while cradling a huge baby.

Presently due to insubordination on the part of my pulmonary system I stopped to catch a breather in a large boulder field.  About 3 weeks ago I acquired the felicity of walking pneumonia and am still feeling the effects.  After a minute or two, what I can only describe as a chukar whisper seemed to emanate from the rocks to my immediate left.  The sound was barely audible, and far more subdued than I had ever heard before.  My thought was that the call must have been more distant and I'd experienced a sound effect in the strewn boulders.

Following a few seconds of questioning the wisdom of combining thin air with cough syrup, I heard it again - "chuk-chuk."  There were partridge about, and they were close.  Really close - within feet.  Over the last 25 or so years, I've hiked, hunted, scouted, and photographed in chukar habitat hundreds of times, and I can't say that I've ever managed to get nearer than 15 yards.  Until now.

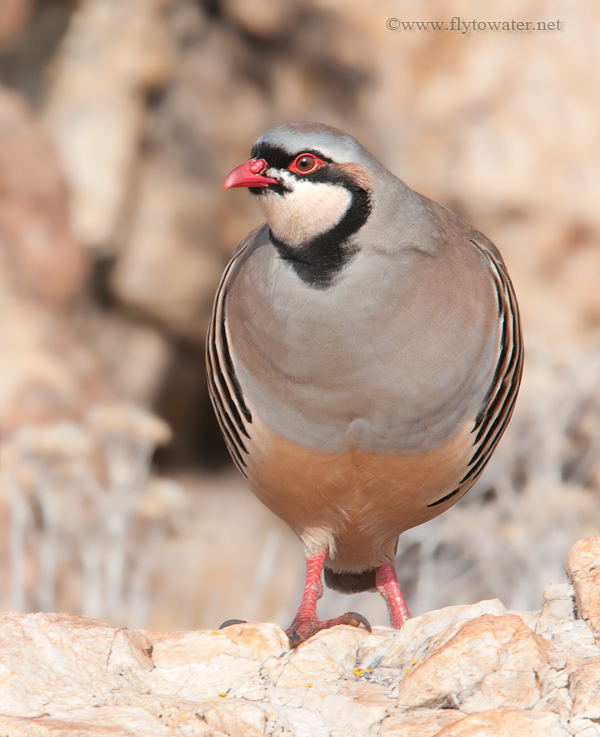
 Wild Chukar Partridge - Spitting Distance

18 feet in front of me a mature, well-marked bird hopped up on a rock and was positioned ideally to catch the morning sun.  Had I not been forewarned by the muted calls, which enabled me to raise my lens just in time, I have no doubt a flush would have been instantaneous.  As it was, I captured a short series of images from spitting distance.  At this range I believe my Sitka Gear Open Country camouflage probably made a huge difference, allowing me blend in under point blank scrutiny.

See No Evil

This was a great way to finish out 2011 - with a humbling opportunity that I was privileged to see through the viewfinder. 

Wild Chukar Partridge - 6 Yards

Nikon D300
Nikon 400mm f/2.8 VR - f/8, 1/320, ISO 400
Distance to Subject - 6 Yards/18 Feet

Monday, December 26, 2011

The Eyes Have It

"Look at me when I'm talking to you!"

If you are a guy of they XY chromosome persuasion, chances are you have had this type of exclamatory remark flung in your direction. Due to a vast conspiracy between extroverts and chick flick producers, eye contact became an important, non-verbal communication element at some point in history.

While information technology professionals have been fighting this alarming and intrusive trend for decades via non-violent, downward gazing - such efforts have done little to stop the insanity.

Looking into the eyes establishes a connection.  Similar body language is evident even in animals, where the direction of a stare or glance can have much deeper social meaning. 

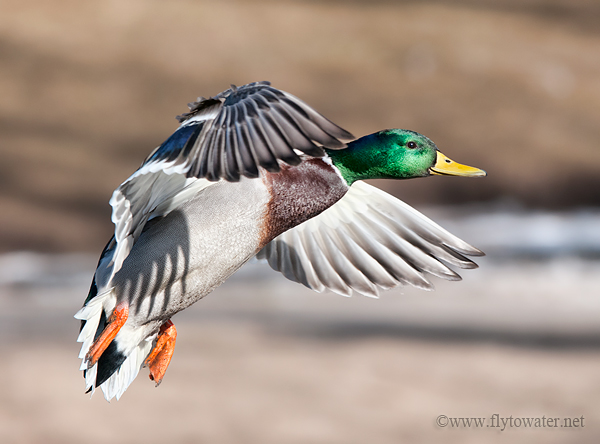
In wildlife photography, creating a linkage between the viewer and the image is paramount.  Eyes are a critical component of the subject in this regard.  Aside from intentional, artistic abstractions - successful images must capture the eye in sharp focus and without motion blur.  This remains true regardless of distance and whether you are capturing a tight shot or broader environmental portrait.

Mallard Drake Glide Path

It can be Hell's own fun tracking focus on the eye of a fast-moving bird while experiencing a fit of the galloping shivers.  It's a perishable skill that takes practice.  If you're looking to improve your technique, my suggestion is to find a location with a lot of mid-sized birds like seagulls which tend to congregate in groups and fly around in circular patterns.  Use the same gear you take into the field, and rehearse focusing on the eye.  You might get some odd looks bombing photos of gulls, but it's a small price to pay to avoid the opprobrium of eye blur when it counts.

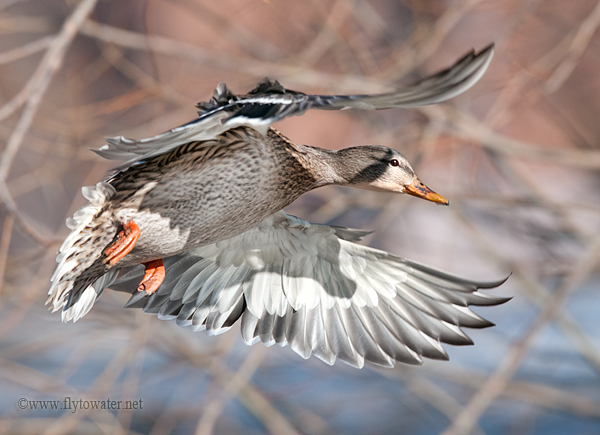
Mallard Hen on the Wing

Don't settle, like Kate Hudson did for Chris Robinson.  If your intent is not an abstraction of some kind - the eye simply needs to be sharp.  Make sure not to confuse missed focus with motion blur caused by a shutter speed which is too slow.  Waterfowl will usually have some wing blur at 1/1250, with action freezing well at 1/1600.  As a starting point select the camera's shutter priority mode on one of these two settings and adjust as conditions require.

Happy Holidays - and thanks for reading during 2011!  I wish everyone a fantastic New Year.

Nikon D300
Nikon 400mm f/2.8 VR - f/5.6, 1/1600 (8x Optical Magnification) - Hand Held
ISO 400
Distance to Subjects: 20 yards/60 Feet

Saturday, December 3, 2011

Quote the Chukar

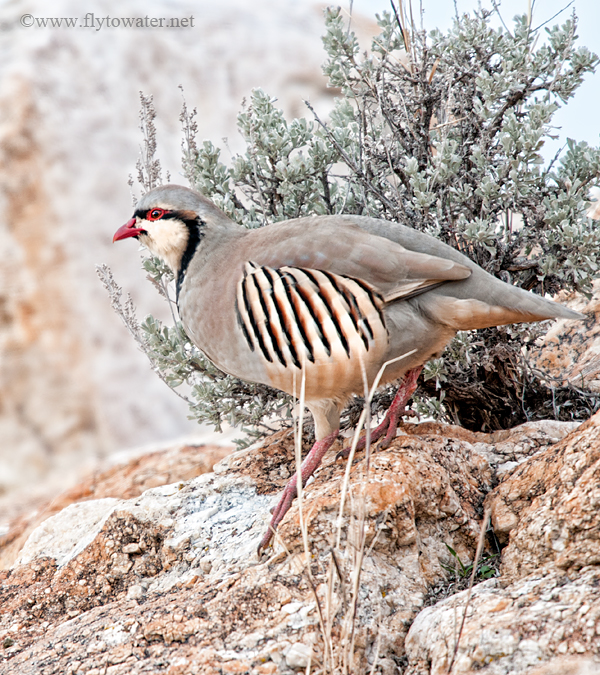
The chukar partridge (Alectoris chukar), is so named due it's distinctive call which sounds like "chuk."  Native to locations in Asia such as the Himalayas and Nepal, it should come as no surprise that these little birds enjoy rugged terrain.

To describe the habitat chukars prefer as "steep" is to say that getting kicked in the gonads is bothersome.  Somehow it doesn't adequately sum up the experience.

Hunters and photographers of these partridge can also be identified by their calls, which happen to rhyme with "chuk."  It has been said that a person hunts chukars for the first time out of curiosity, and thereafter for revenge.

To me, no other game bird embodies the qualities of a survivalist quite like them.  Living in the high desert foothills is a game of extremes.  Water and food are scarce, and predators abound.  The chukar is well suited to a harsh life, and is tremendously challenging to photograph.

Infiltrating a covey with 20+ sets of keen eyes, each pair honed by daily existence as a prey animal, can be an exercise in futility.  Add rocky, vertical geography to the mix and it's downright sporty.  If those were the only considerations involved, life would be good.  Unlike the hunter, the photographer also needs to make it all happen during ideal lighting conditions and be positioned on the sunny side of the bird as the opportune moment arrives.

A truly complete image is rounded out by some supporting environmental elements within the frame, helping to add context to the scene.


Some native grasses in the foreground, sage brush in the immediate background, and the ever-present rocks so common to a chukar's stomping grounds help complete the story.

Distance to Subject: 45 Feet/15 Yards